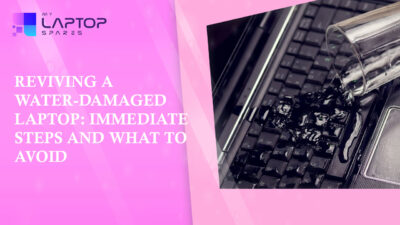
You’re working diligently on your laptop, sipping a cup of coffee, and suddenly, disaster strikes: the coffee spills all over your beloved laptop! Panic sets in as you watch liquid seep into your keyboard, but remember, there’s a chance to salvage your device if you act quickly and methodically.
When this happens, people often have two thoughts. Whether the issue could be resolved through laptop water damage repair or whether it is permanent. Still, many people believe that since they spilled water on the keyboard, the laptop is dead and will never be used again, but this is not always the case. It is probable that some damage has been done, however the techniques for Liquid Damage Repairs outlined below will work wonders for you.
In this blog, we’ll walk you through the immediate steps to take when water spills on your laptop, helping you increase the chances of saving your precious computer.
Power Off Immediately
The first and most crucial step is to power off your laptop immediately. The laptop should be turned off and disconnected from the power source as soon as possible. Save any important documents immediately, then hold down the power key for around five seconds to shut down the computer. Press the power button until the laptop turns off.
Do not hesitate, even if your computer seems to be working fine after the spill, powering it down is essential. Electricity and water do not mix well, and you don’t want to risk short-circuiting your laptop.
Unplug All External Devices
If you have any peripherals connected to your laptop, such as a mouse, keyboard, or external hard drive, disconnect them promptly. This will help you assess and address any potential damage to these devices separately.
Quickly remove the charger cable from the laptop to disconnect it from a power source. The laptop must not get any power to save internal components from shortage.
Remove the Battery (If Possible)
If your laptop has a removable battery, take it out. Remove the battery from the laptop. By doing so, liquid will be prevented from reaching the battery unit and posing an electrical hazard to internal components.
This will further reduce the risk of electrical damage. You can remove the battery by turning your laptop upside-down, sliding the battery lock to the side and gently tugging on the battery.
It is not possible to easily remove the battery on some laptops. On MacBooks and most ultrabooks, the battery is inside. You need to unscrew the bottom casing of the laptop to access the battery connector.
Flip It Upside Down
Carefully invert your laptop after a spill to encourage the drainage of any residual liquid. Be gentle during this process to prevent the liquid from spreading further inside the device, as spreading could lead to more extensive damage.
If there is any residual liquid on the laptop, remove it. As a result, you will decrease the risk of an electrical shock as well as minimize your laptop’s exposure to more liquid.
Place a dry towel on a flat surface in the example table. Open your laptop as a book and lay it face down on the towel. The best form is tent tent-shaped laptop lying upside down. This will speed up the drying process.
You can use a warm fan to help evaporate the liquid faster.
Open It Up
If you have some technical know-how and feel comfortable, you can carefully open your laptop’s back panel to allow for better airflow and drying. However, this step is not recommended if you’re not familiar with laptop internals, as you may inadvertently cause more harm.
Dab, Don’t Rub
When dealing with a liquid spill on your laptop, it’s crucial to use a lint-free cloth or paper towels for the cleanup process. Gently dab the spilled liquid from the laptop’s surface without applying pressure or rubbing. Rubbing can inadvertently force the liquid deeper into the delicate internal components, potentially causing more extensive damage. The goal is to absorb as much moisture as possible without agitating the spill, increasing the chances of a successful recovery, and preventing further harm to your laptop.
Remove Components
If you’re comfortable with disassembling your laptop, you can remove components like RAM and storage drives to facilitate the drying process. Remove as much hardware as you can. Take off the bottom cover and remove all possible hardware.
If you don’t know how to remove RAM or other detachable internal components, better take your laptop into a professional repair service. If there is and excess water inside your laptop, carefully drain it with microfiber cloth.
If you have a Surface, MacBook, ultrabook or any other laptop that you cannot take apart or even remove the battery, place the laptop upside down and take it to a repair center ASAP.
Allow to Dry
Now comes the waiting game. Leave your laptop to dry in a well-ventilated area for at least 24 to 48 hours. Avoid using a hairdryer or heat gun, as excessive heat can cause more damage. Placing your laptop near a fan or using desiccants like rice or silica gel can help absorb moisture from the internals.
Professional Assessment
After the drying period, it’s advisable to have your laptop inspected by a professional technician from a reputable Laptop Repair Shop. They can assess the extent of the damage and perform necessary repairs if needed.
Some damage, like corrosion on the motherboard, may not be immediately visible. Before attempting to power on your laptop, make sure to back up your data if you haven’t already. There’s a chance that even after drying, your laptop may not work properly, and you could lose your files.
In conclusion, the care you provide to your laptop plays a pivotal role in its longevity and performance. Swift action can often spare you the expense and inconvenience of a costly visit to a laptop repair service; nonetheless, it’s important to recognize that not all laptop issues are visible or immediately apparent.
Connect with the experts at My Laptop Spares to learn more.